Table of Contents
Standing in your kitchen, the scent of vanilla and cocoa fills the air. You’re making homemade pinwheel cookies. It’s more than just baking; it’s about making memories with loved ones. The easy pinwheel cookie recipe we share is a celebration of these moments, bringing joy in every bite.
Introduction to Pinwheel Cookies
Welcome to the world of pinwheel cookies! These cookies are not just tasty but also look amazing. They are made by rolling different doughs together, creating a spiral pattern. This idea started with traditional butter cookies and has grown to include many flavors and colors.
The history of pinwheel cookies is fascinating. They first appeared in American kitchens in the early 1900s. They quickly became a hit for holidays and special events. Their unique look made them a favorite at Christmas.
Pinwheel cookies are loved even more today with all the new flavors. Let’s look at some popular ones:
- Chocolate and Vanilla: A timeless favorite, showing off a beautiful contrast.
- Lemon and Blueberry: A fresh mix with lemon and sweet blueberry.
- Red Velvet and Cream Cheese: For those who love rich flavors, this is perfect.
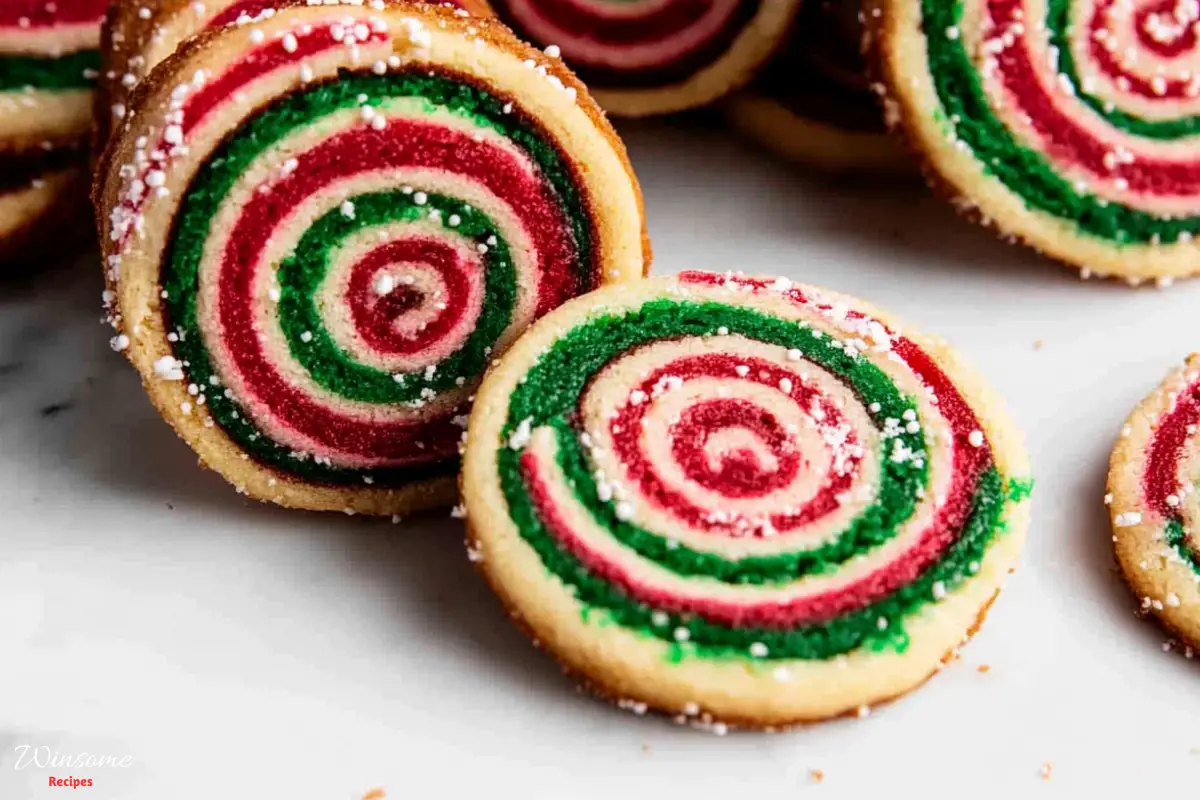
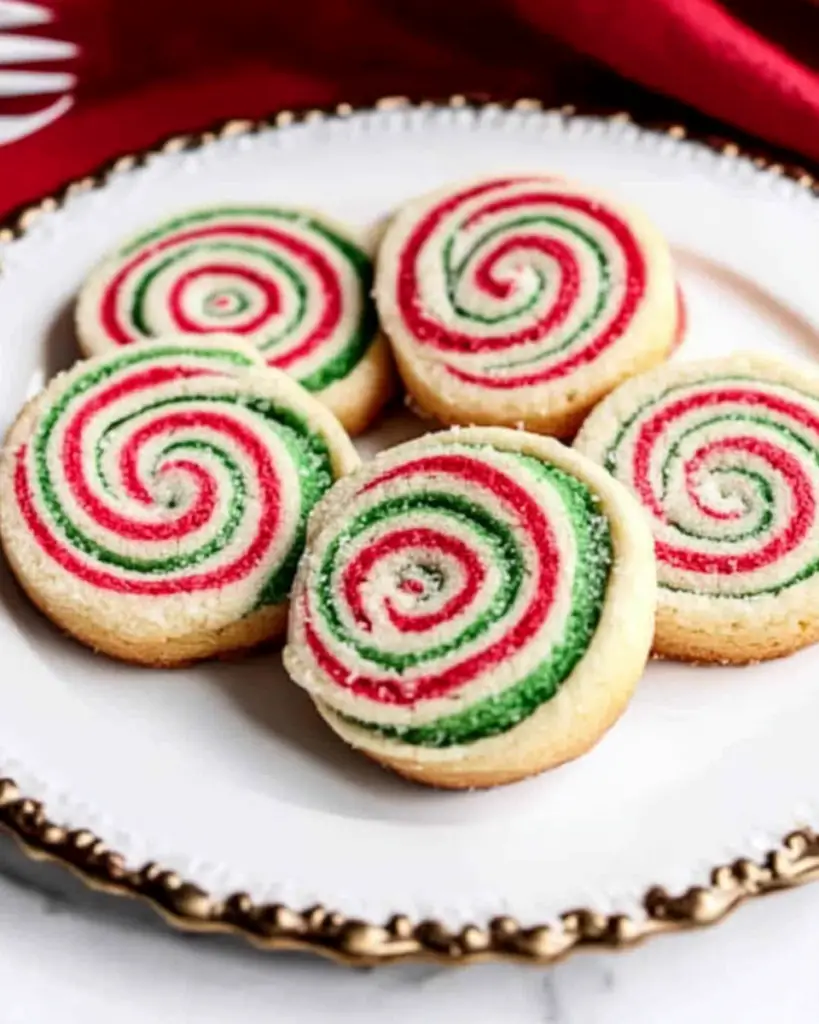
- Holiday-Themed: These use festive colors, making them a Christmas favorite.
Whether you’re an expert or new to baking, making pinwheel cookies is fun. They can be made in many ways, making them great for any event.
Now you’re ready to make your own pinwheel cookies. Next, we’ll talk about what you need to get started. Happy baking!
Ingredients Needed for Homemade Pinwheel Cookies
Making pinwheel cookies is fun and easy. You just need to gather the right ingredients. Basic baking items, flavor enhancers, and food coloring make these cookies perfect for any event.
Basic Ingredients
Every cookie starts with basic parts. For pinwheel cookies, you need:
- all-purpose flour
- sugar
- unsalted butter
- egg
These ingredients make your cookies tender and tasty. More flour helps them not spread too much while baking.
Flavor Enhancers
Flavor enhancers make your cookies special. Think about adding:
- Vanilla extract
- Almond extract
- Espresso powder
- Citrus zest
These add-ons bring out the flavor. Try different extracts or citrus zest for a unique taste.
Food Coloring Options
Food coloring makes your cookies look amazing. Gel-based colors work best because they’re bright and don’t change the dough’s texture. You can choose:
- Red and green for holidays
- Blue and pink for fun, everyday cookies
Coloring your cookies lets you match them to any event. They’re tasty and look great too.

Now you have all you need for delicious homemade pinwheel cookies. Next, we’ll show you how to make them step by step!
Step-by-Step Instructions for Pinwheel Cookies
Learn how to make beautiful pinwheel cookies at home. Follow these steps for perfect results every time.
Preparing the Dough
Start with cookie dough preparation. Cream butter and sugar in a 1:1.33 ratio until light and fluffy. This takes about 3 minutes. Then, beat in eggs and add flavor enhancers like vanilla or almond extract.
Mix in flour, baking powder, and a pinch of salt until smooth. For chocolate, add cocoa powder to half the dough. The dough should be soft and ready to roll out.
Rolling Out and Layering
This step creates the swirls in pinwheel cookies. Divide the dough into the number of colors you want. Tint each portion with your chosen food coloring.
Roll each portion into thin rectangles, about 6-by-7 inches. Layer the colored doughs evenly. Roll them into a tight log to create a spiral pattern when sliced.
Chilling and Baking
Chill the dough to keep the shape while slicing. Refrigerate for at least one hour, then freeze for two hours. Slice the log into ¼ inch thick cookies.
Place the cookies on a baking sheet and bake at 350°F for 9 to 11 minutes. They should be soft and slightly crisp, perfect for any occasion.
Tips for Perfect Pinwheel Cookies
Making perfect pinwheel cookies requires a few key techniques. Here, you’ll find essential tips and tricks to improve your cookie-making skills. These tips will help you achieve those perfect swirls and delicious results every time.
Chilling the Dough
Chilling your dough is a must. Refrigerate it at every major step, like after forming the log. This prevents spreading and keeps the pinwheel design intact. A well-chilled dough is essential for baking perfect cookies.
Rolling Technique
The way you roll the dough is critical. Roll it evenly to avoid uneven cookies. Use a gentle touch to keep the layers distinct. Rolling tightly from the start ensures the swirl effect you want, giving your cookies a professional look.
Troubleshooting Common Issues
Even with the best tips, issues can happen. If your dough is sticky, add more flour when rolling. For cracks, press gently with moist fingers to fix them. Avoid over-mixing to prevent a tough texture.
Chilling the dough log for at least an hour before baking helps. It ensures your cookies keep their perfect swirls during baking.
Decorating and Storing Pinwheel Cookies
Decorating and storing pinwheel cookies is key, whether for a holiday or just for fun. These steps help your cookies look great and stay fresh longer. Let’s explore how to do it!
Decorating
Decorating your cookies can make them even more special. Here are some fun ways to decorate:
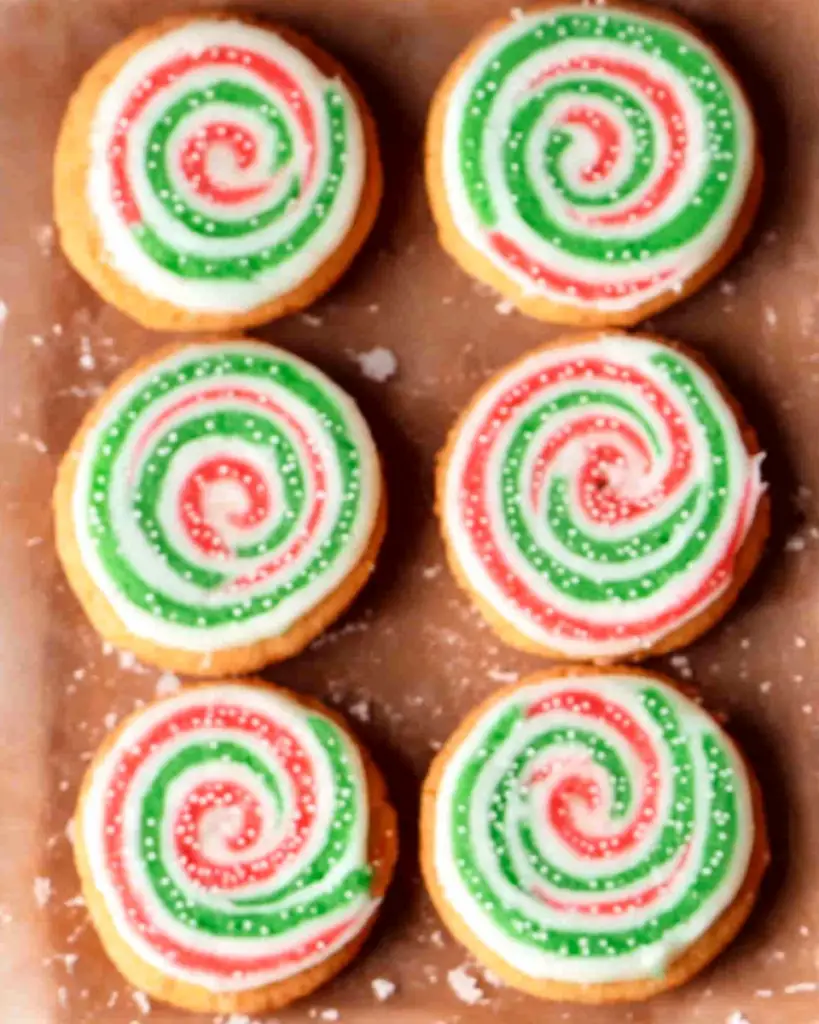
- Sprinkles: Sprinkle colorful sprinkles on a glazed cookie for a fun touch. Choose colors that match the occasion, like red and green for Christmas.
- Sugar Pearls: These tiny, shiny pearls add elegance. They’re perfect for special events like baby showers or weddings.
- Chocolate Drizzles: Drizzle melted chocolate over your cookies for a tasty and pretty look.
- Custom Glazes: Make a glaze by mixing powdered sugar, water, and food coloring. Spread it on for a shiny, colorful finish.
Storing
Storing your cookies right is important to keep them fresh. Here’s how to store them:
- Room Temperature: Keep cookies in an airtight container at room temperature. They stay fresh for up to a week.
- Refrigeration: For longer storage, refrigerate them in an airtight container. They last about two weeks.
- Freezing: Freeze cookies for even longer storage. Layer them with wax paper in a sealed container. They can stay frozen for 1-2 months.
- Cookie Dough: Freeze cookie dough for fresh cookies whenever you want. Wrap it tightly in plastic wrap and store in an airtight container. It can be frozen for up to 2 months.
By decorating and storing your cookies right, they’ll always be ready to impress. They’ll look great and taste amazing.
Frequently Asked Questions
Pinwheel cookies are a delightful treat, perfect for any occasion. Below, we’ll address some common general cookie queries, baking FAQs, and pinwheel cookie questions.
What method are pinwheel cookies made of?
Pinwheel cookies are made using the creaming method for the dough. This involves creaming together softened butter and sugar until fluffy. Then, eggs and vanilla extract are added gradually.
Once you have the dough, it’s rolled out, layered with contrasting dough (often chocolate), and rolled into a spiral. The final step is slicing the roll into individual cookies, giving them the name “pinwheel.” This roll and slice technique is key for the swirl pattern.
How long does cookie dough rest?
Typically, cookie dough should rest in the refrigerator for at least 1-2 hours. This makes the dough easier to handle and enhances flavors. If the dough is too sticky, refrigerate it for at least 30 minutes to firm up.
What is the hardest cookie to make?
Many bakers find cookies requiring precise temperature control, like caramel-centered or macaron cookies, to be the hardest. These cookies need careful attention during baking to achieve the perfect balance of texture and flavor. Pinwheel cookies, while visually appealing, are relatively manageable with the right techniques, like proper chilling and careful rolling.
How much sugar is in a pinwheel cookie?
The sugar content can vary with different recipes, but a basic batch might include around two cups of sugar. This generally translates to about one cup of sugar for every dough layer, affecting both the sweetness and texture of the cookies. Remember, additional sugar from decorations, like red sanding sugar, can add extra sweetness and crunch to the exterior.
Conclusion
Making pinwheel cookies is a fun experience that brings joy to your kitchen and taste buds. You’ve seen how each step, from gathering ingredients to decorating, adds to the delight. These cookies are perfect for family treats or holiday parties.
As you get better at baking, remember the joy is in the journey, not just the end result. Enjoy the creative process and savor the delicious outcome!
Print
Pinwheel Cookies
- Total Time: 25 minutes + 2h Chill time
Description
These colorful and festive Pinwheel Cookies are a delightful addition to any holiday cookie platter. With vibrant swirls of color and a sugary crunch from nonpareil sprinkles, they’re as fun to make as they are to eat!
Ingredients
- For the Dough:
- ¾ cup salted butter, softened
- ¾ cup granulated sugar
- ¾ cup powdered sugar
- 2 eggs
- 2 teaspoons vanilla extract
- 2½ cups all-purpose flour
- ½ teaspoon baking powder
- ½ teaspoon salt
- Gel food coloring (red and green)
- Holiday nonpareil sprinkles
- Optional Flavors:
- ½–1 teaspoon additional flavor extracts (e.g., peppermint, almond, lemon)
- Lemon zest (for a citrus twist)
Instructions
- 1- Prepare Dough:
- Cream butter, granulated sugar, and powdered sugar together until light and fluffy.
- Mix in eggs and vanilla extract, along with any additional flavorings if desired.
- In a separate bowl, combine flour, baking powder, and salt, then gradually add to the wet ingredients to form a smooth dough.
- 2- Divide and Color:
- Divide the dough into three equal portions.
- Leave one portion uncolored, and tint the other two portions with red and green gel food coloring.
- Flatten each portion into a disc, wrap in plastic wrap, and chill in the freezer for 20 minutes or the refrigerator for 1 hour.
- 3- Roll and Stack:
- Roll each disc into a rectangle of similar size on parchment paper.
- Layer the dough, with the white dough in the middle and red and green on either side, using parchment paper to assist with flipping and aligning.
- Trim the edges to create a neat rectangle.
- 4- Shape into Log:
- Carefully roll the stacked dough into a tight log, using parchment paper to help prevent cracks.
- Wrap the log in plastic wrap and chill in the refrigerator for at least 1–2 hours.
- 5- Slice and Decorate:
- Preheat oven to 350°F (175°C) and line baking sheets with parchment paper.
- Roll the log in nonpareil sprinkles, pressing firmly to ensure they stick.
- Slice into ¼-inch rounds and place on the prepared baking sheet, spacing 1–2 inches apart.
- 6- Bake:
- Bake for 10–12 minutes, or until cookies are set but not browned.
- Cool on the baking sheet for 5 minutes before transferring to a wire rack.
Notes
The provided nutrition information is an estimate and may vary depending on the cooking methods used and the specific brands of ingredients selected.
- Prep Time: 15 minutes
- Cook Time: 10-12 minutes
- Category: Cookies
- Cuisine: American
Nutrition
- Serving Size: 1 cookie
- Calories: 115 Kcal
- Sugar: 8g
- Sodium: 84mg
- Fat: 5g
- Saturated Fat: 3g
- Carbohydrates: 16g
- Protein: 1g
- Cholesterol: 23mg
Keywords: christmas pinwheel cookies, pinwheel cookie, spiral cookies, chocolate vanilla swirl cookies, xmas swirl cookies
4 thoughts on “Pinwheel Cookies Recipe”